Simple Chocolate Fudge

fudge10It’s here!!  It’s finally here!!  Can you smell it?  The beautiful smells of cinnamon, pine, and chocolate, but not at the same time..LOL!  The three smells that I absolutely cannot get enough of when it comes to the holidays!  And it’s the year’s annual baking frenzy, which gets me all excited, especially this year because I haven’t gotten into this frenzy in a few years, either because I was busy with a baby or fighting with my dad’s health insurance for over a month.  This year I got my mixer and I’m gonna use it!!
But before I get myself knee-deep into flour and the whirling sound of my 14-year-old Kitchen-Aid mixer I’m taking to the stove.  I always start out easy and get some things out of the way first since it only takes a few minutes to do, and it’s all worth doing!
fudge1This 3-ingredient fudge recipe is the easiest thing to do, a kid can handle this one!  I haven’t introduced the tot to the stove yet; she prefers to watch.  So grab a stool for your kid to stand on and watch, or let them go for it!
fudge2
fudge3
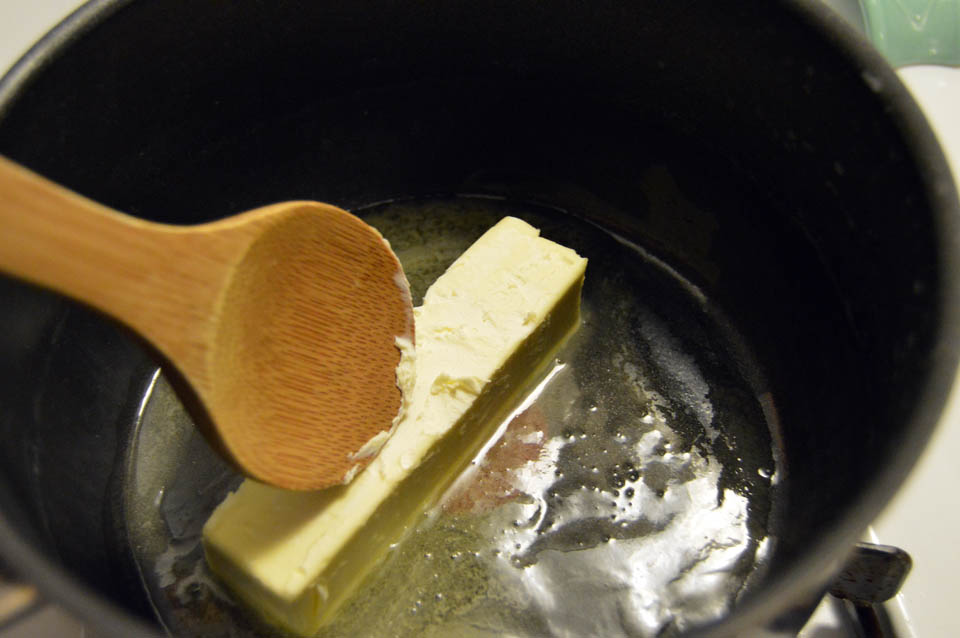
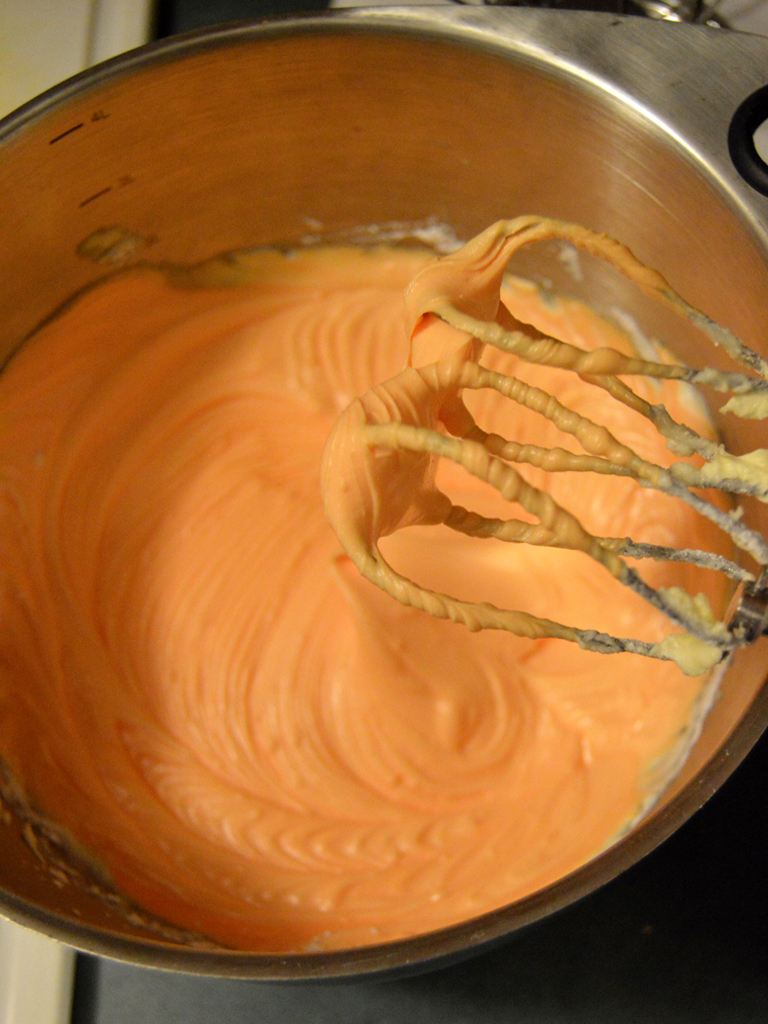
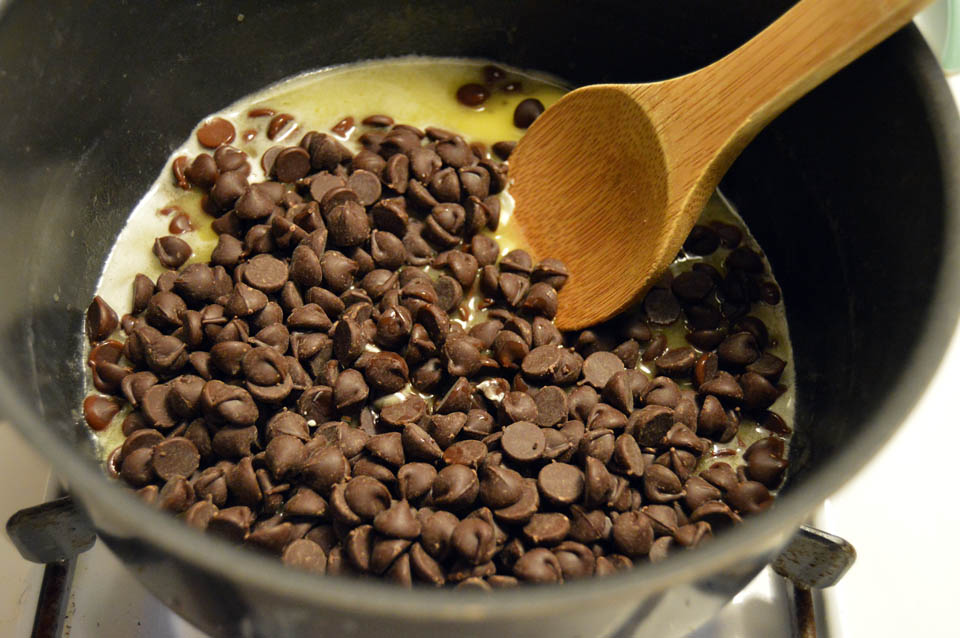
Some people do the glass bowl method over the saucepan to melt chocolate.  I just throw it in the saucepan, but of course, being careful not to burn the chocolate or you’re going to have bits of burnt pieces in your fudge and that’s not cool.  Throw in your stick of margarine and a bag of chocolate chips and stir away!
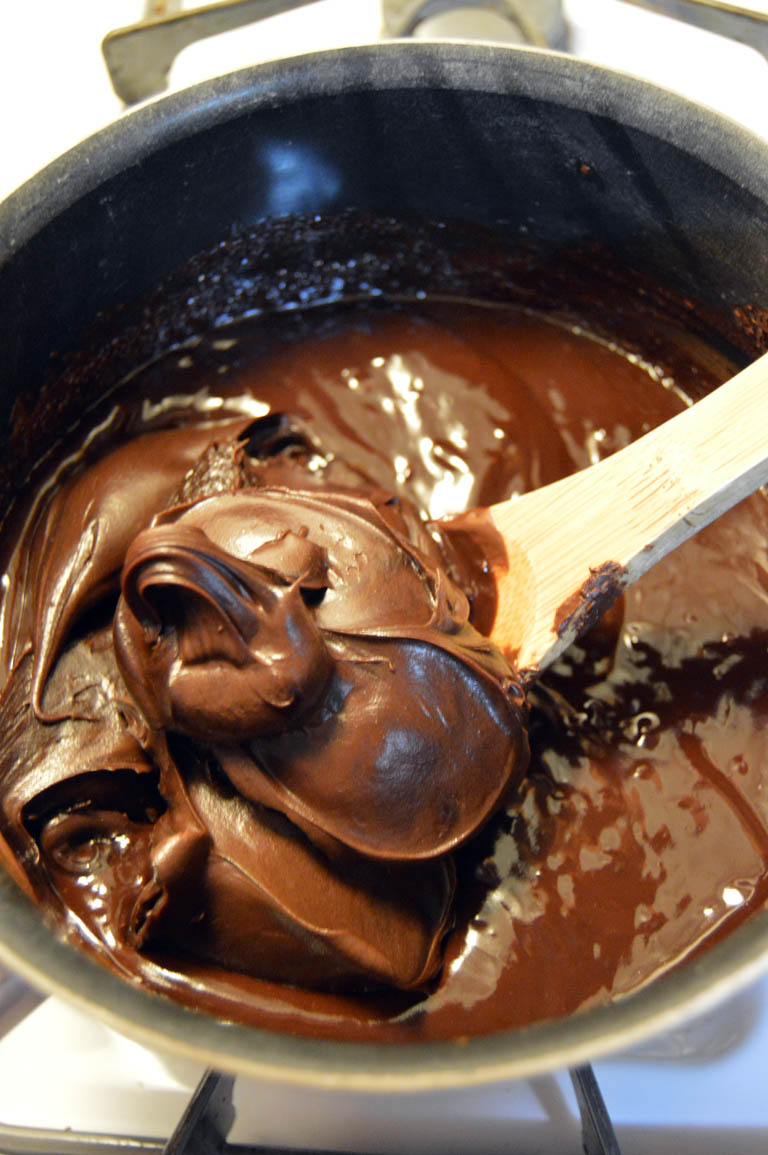
Once it’s all melted, turn off the heat and remove the saucepan off the burner.
fudge8Dump in your chocolate frosting and stir until it’s all combined.  Sometimes I’ll use the fudge frosting to give it a more fudgy taste.
fudge5
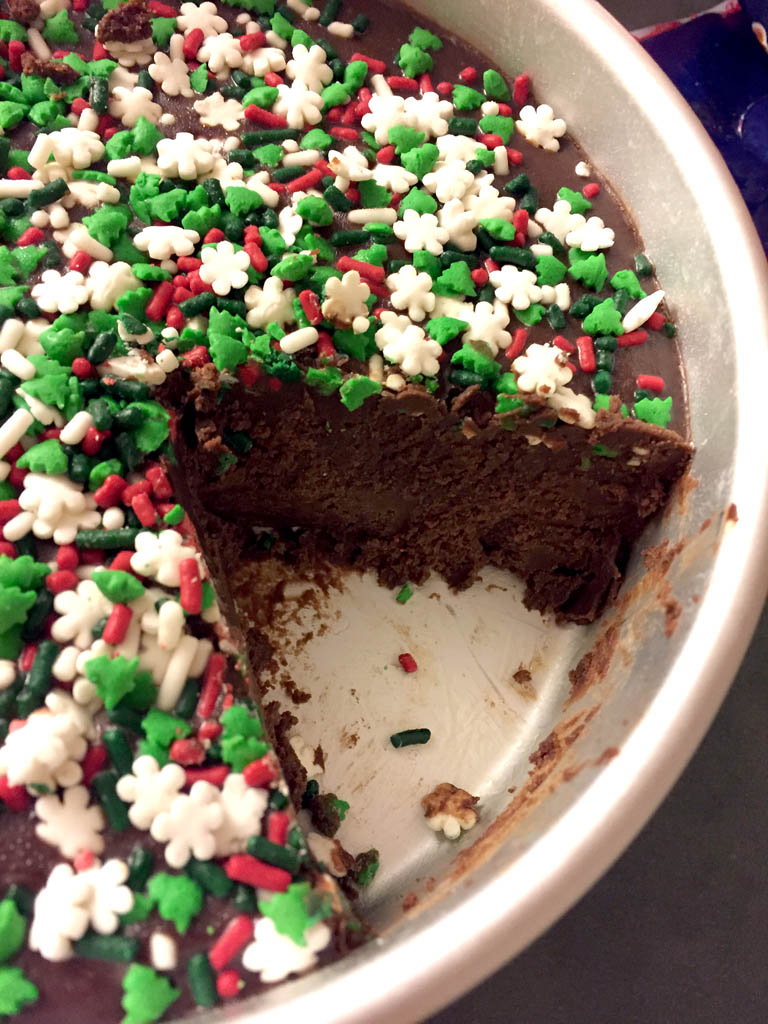
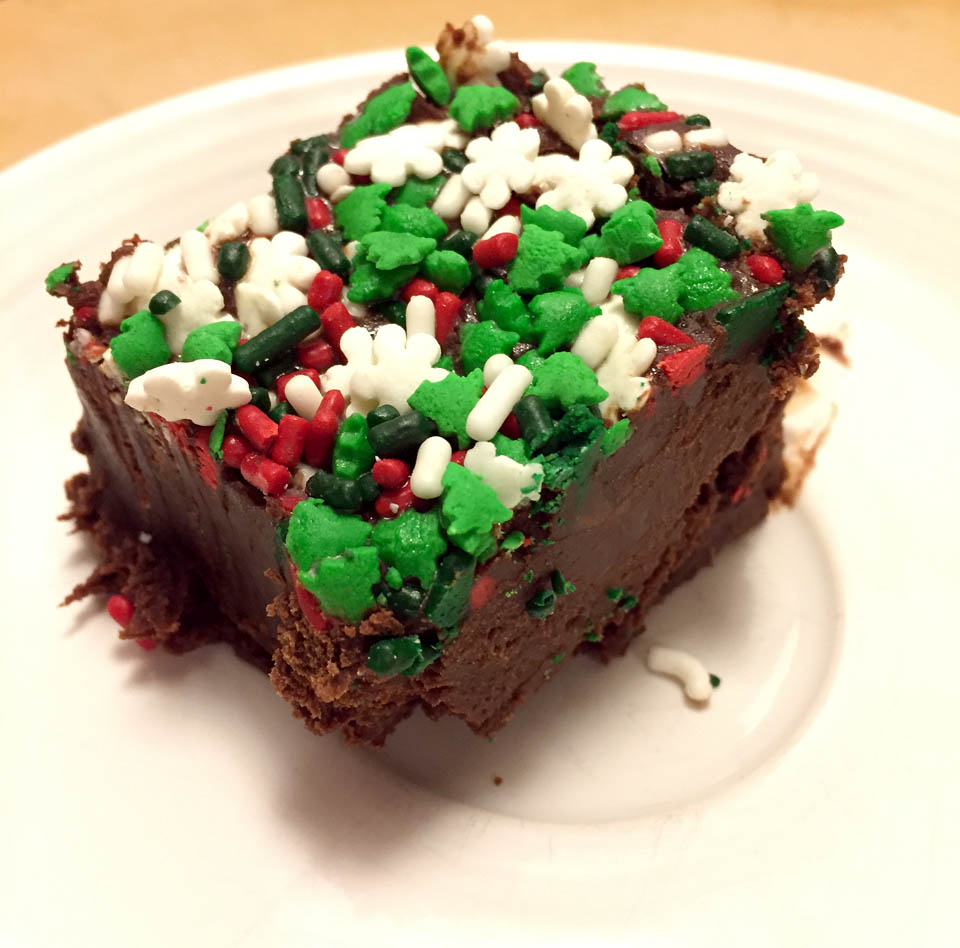
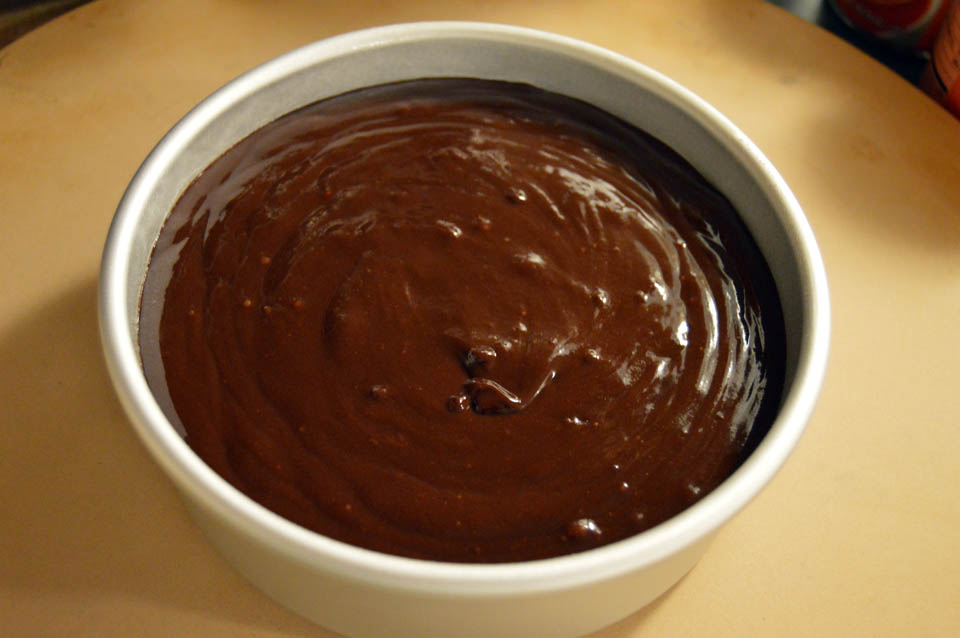
Once it’s all stirred up, grab your prepared 8×8 cake pan, or any small pan you prefer, and pour the fudge mix into it.  Gently shake the pan side-to-side to get the fudge to spread to the sides.  If you’d like, go ahead and give the fudge a festive feel by sprinkling some holiday sprinkles on top and let it set.  Place the pan in your refrigerator to allow the fudge to set quicker, and then cut into squares.  It’s that easy!
To store in the freezer, I always cut into squares and place them in a freezer-friendly storage container.  A rule of thumb: be sure you place wax paper in between each layer of fudge for storage or your fudge is going to all stick together.
Now for the hard part: If you plan to pass out this fudge to your friends and loved ones, don’t eat it!  If I were you go ahead and double up this recipe just so you can have some for yourself!

fudge9

SIMPLE CHOCOLATE FUDGE
The name says it all.  It’s simple, it’s fudge, it’s delicious!  Get the kids involved!
1 stick of margarine
1 package of semi-sweet chocolate chips
1 container of chocolate or fudge frosting
• In a medium saucepan, melt the margarine on medium-high heat.
• Next, add the chocolate chips, and continuously stir morsels until melted and smooth.
• Once chocolate chips are melted, immediately remove from heat and add the whole container of frosting; mix until well combined.
• Spray an 8×8 baking pan with non-stick cooking spray, then pour the fudge mixture into the pan.  Gently shake the pan side-to-side to help spread the fudge to the sides.
• Refrigerate until fudge is firm to the touch, about an hour or so.  Cut into squares and serve, or store in the freezer in a freezer-safe container.  Be sure to place a piece of wax paper in between fudge squares if stacking.

Candy Corn Chip Cookies

candycornchip1Thanksgiving is here, and this post is so late..LOL!  We like to discuss Halloween in our house year-round, but let me tell ya, the holiday was pretty awesome!  The husband had back-to-back-to-back shows with his band, and I got to see two out of three!  Also Alex went out on her first trick-or-treat adventure….with this guy.
candycornchip7Go ahead, blame me for putting the Halloween theme song in your head!
Yes, Michael Myers played bodyguard while all the other little ghosts and goblins stayed 10 feet away from them..LOL!  Everybody in our neighborhood looks forward to trick-or-treating because they know Myers will be out giving the kids a little fright, and some candy.  Mike’s been doing it for 13 years and the neighborhood kids (and the parents, too!) love it!
candycornchip6Alex made out pretty good with the candy!  She even got a big bag of candy corn from her grammy and pappy.  She and I are the only two people in our house that L-O-V-E candy corn!  It was her first taste of it this year and I think she now has an addiction!  Love them or hate them; there’s no in-between, just like marshmallow peeps.  Facebook’s been giving candy corn a bad rap around Halloween, but mostly it’s because a lot of my friends hate it, so I rejoice…that’s more candy corn for me!!!
candycornchip2Now being stuck with 4 bags, I really candy corned myself out this past Halloween.  I tried baking them in cookies last year, but failed because when you bake candy corn it melts.  And due to the melting, the cookies became flat and runny-looking.  Recently I was doing my nightly pinning on Pinterest when I stumbled upon Averie’s blog.  She somehow mastered baking candy corn into her cookies, so I had to read on.  The secret for not having your candy corn melt is to be sure they are not exposed to the baking sheet.  Sounds easy, right?  Well, unless you use a lot of candy corn it can be tough.  Once you scoop the cookie dough onto the baking sheet, push in exposed candy corn into the dough.  While baking, the dough helps prevent the candy corn from melting.  I tried it, and a good majority of the cookies turned out great!  If it wasn’t for Averie I’d still be scratching my head trying to figure it out!
candycornchip3I used the same recipe for the chocolate chip cookies; I just replaced the semi-sweet morsels for one bag of white chocolate morsels and half a bag of candy corn.  Have other Halloween candy to get rid of?  If you got some fun-sized bags of M&Ms or Hershey bars or peanut butter cups, just cut ’em up and throw it in the dough!  Kinda like the Easter cookies I made.
Fast-forward from Halloween to Thanksgiving, I filled up on some turkey and mashed potatoes today and will be doing it again this weekend, and then I rev up the baking machine for Christmas!  For the next month I’ll share with you some of the goodies I’ve always made with my mom growing up, and I plan to decorate the sour cream cookies the way I once did…feeling pretty nostalgic these days, the memories of family get-togethers and the food…oh the food!!!  The one thing I’m oh-so thankful for is family, especially my little family who I love and support.  It’s been a tough year, but we’re stronger for it.
I hope you all are having a very Happy Thanksgiving, and make sure you save room for dessert!!

Simple Pizza Dough

pizzaI decided it was time to share my first ever non-dessert post (maybe the first of many) on The Sweet Obsessions!  Pizza is an obsession too, so why not!  And it’s also proof that I do cook..LOL!
Unfortunately, I only have this photo of my first homemade pizza I made in forever.  I had it planned when I got word that there was a possibility that my niece was coming to town, so I thought about making a real simple dinner.  She couldn’t make it, but since the husband has Fridays off now (lucky him!) and the weather was turning sour I decided to make the pizza then.
I used two types of cheese, mozzarella and provolone, along with a jar of tomato, basil and garlic sauce, sliced green peppers, tomatoes, mushrooms, and some pepperoni.  The dough is a simple pizza dough that my mother used all the time.  While spreading the dough out on the pizza stone I come to the conclusion that there was no need for this pizza to be perfectly round.  Mom used to complain while making a perfectly round pizza when the dough would get too thin from spreading and then holes appear.  I didn’t bother making this pizza perfectly round, and there is only the three of us anyway.  I threw on the toppings, placed it in a 375-degree oven for 25 minutes and viola!
After buying a lot of store-bought pizza or at the local pizza joints, fresh homemade pizza is definitely best, hands down!  Top it how you want, as much as you want!  I think I’ll make this again for game day this coming weekend!

Simple Pizza Dough

3 cups all-purpose flour
3 tablespoons granulated sugar
1 teaspoon salt
1 package of dry yeast
1/3 cup vegetable oil
1 cup warm water
• Preheat oven to 375-degrees.  Spray round pizza pan or pizza stone with cooking spray.
• In a large bowl, combine all the dry ingredients until well mixed.
• Add liquids, and with fingers (spray them with cooking spray or rub flour on them to prevent the dough from sticking to you!) knead until dough forms.*
• Spread the dough out with your fingers to your desired thickness.
• Add your toppings.  Begin with your favorite tomato sauce.  Be sure to not spread sauce all the way to the edge.   If using more than 1 type of cheese, top with first cheese, then add toppings, and then place your second cheese over top of the toppings.
• Bake 22-25 minutes until crust begins to become golden.
*Note: If you don’t want to get your hands dirty, just use your stand mixer with the dough hook attachment!

Orange Cookies

orange1Awww…the last few days of summer.  The heat, the waves, the sound of the lawn mower buzzing in the neighbor’s yard, the wonderful smell of barbecue chicken…it’s coming to an end, and I’m gonna miss it so much.  My husband is already in a Halloween mood (he’s in that mood year-round!), and the leaves are slowly starting to fall.  Please don’t go, summer!  **sniff**
But there is one thing I will not miss about this summer is the mosquito bites.  For about a month-and-a-half, my legs were constantly itching, and I must’ve received over 30 bites!!  You’re probably asking why in the hell I don’t use bug repellent!  Well, first off, I’m lazy, and second, I’m a little twitchy about that stuff getting into my bloodstream, and third, I haven’t bothered with doing an online search for better bug repellent, so I’ve been using this bug bite relief stuff that you can rub on the bite (and make it itch more!) and it only works half the time.  I torture myself…too much!
orange2 orange3Sorry, I’m rambling again…let’s get back to the good stuff here!  The summer baking was good.  I did a few cookie orders for some friends and family members and I made a TON of salty caramel chip cookies because I cannot resist them!!  But I can’t say they are the official cookie of summer.  I recently discovered a really good cookie that will remind you of hot summer days relaxing with a glass of lemonade under a shaded tree…or orange juice.  They’re orange cookies!  I don’t recall my mom ever making these, but I found the recipe in her recipe box and had to try them.  The first person to try them was my husband.  He said they taste like you’re “eating an orange.”
orange4 orange5 Now I must say that these cookies are the official cookie of summer!  They’re soft, and the citrus-y flavored frosting has the perfect touch as well as the citrus-y flavor in the cookie itself, and they’re great for kids.  And yes, they are Alex-approved!
Right now, I’m holding off on all things pumpkin spice until the first official day of the autumnal equinox, because I’m currently savoring the last hours of sun and citrus, and devouring these cookies.
So for now, goodbye, summer.  It’s been real!  See you next year!

orange8ORANGE COOKIES

Cookies:
1 cup softened margarine
2 cups sugar
1 cup buttermilk
1 teaspoon baking soda
2 teaspoons baking powder
2 eggs
5 cups flour
2 oranges, squeezed for juice and grated for zest, divided
Frosting:
2 lb. bag of powdered sugar
12 tablespoons softened margarine
Reserved half of squeezed and grated orange mixture
3 tablespoons milk
• Preheat oven to 350-degrees.  Spray cookie sheets with non-stick spray, or line with a silicone mat or parchment paper.
• In a small bowl, grate both oranges and then cut them in half to squeeze out the juice.  Stir together.
• In a mixer bowl with paddle attachment, cream together the margarine and sugar.  Then add eggs and beat well.
• In another small bowl, stir together the baking soda and buttermilk until dissolved; blend into the wet ingredients.
• In a large bowl, mix flour and baking powder together.  Then alternately add to the wet ingredients.  Fold in HALF the orange juice/zest mixture (Save the other half for the frosting!).
• Drop heaping tablespoonfuls of dough onto prepared cookie sheet.  Bake 10-12 minutes until golden on the bottom.
For Frosting:
• In a mixer bowl with paddle or whisk attachment (I normally use paddle attachment; either one works well.) mix all ingredients together until a nice, soft consistency.  If frosting is too thick, add a tablespoon of milk at a time until it thins to your liking.
• Frost cookies and decorate with sprinkles, if desired.

Peach Galette

PeachGalette6On our way back from the beach we always take time to stop at this really awesome farm market just a few hours from home.  They were loaded with peaches of all kinds.  Red haven peaches were the ones I purchased, and little did I know that a bag of peaches is called a peck.  There’s 1/4, half, and whole pecks of peaches ready for purchase.  I went for the 1/4.  Plus I never go without buying their mix for apple crisp…yummy yum yum!!!!
PeachGalette7 PeachGalette1
And while there we always go to the wooden train display.  The tot is a train junkie, so she loves climbing in and out of the cars.  We also started this little tradition where every year we take a photo of her on the train.  We started when she was 18 months old.  Now she’s 3, and when you see the photos side-by-side…she’s growing up too damn fast…and she’s very tall for 3!  She’s already in youth-size shoes and exiting out of toddler-sized clothing!!  And she loves peaches, so this trip to the farm market was tops!

PeachGalette3PeachGalette2

I knew I wanted to make some sort of pie with the peaches, but I didn’t want to do just any ol’ peach pie.  I stumbled upon Yossi’s post on the easiest pie crust ever, and I loved how it is made!!  3 ingredients, that is all!!  Super-duper easy-peasy to me!!  The crust was made for galettes or small pies, which is another type of pie where no pie plate is required; you use the dough as your plate.  It’s like a pouch to put your favorite fruit in and bake it.  I never done it before and I just had to try it out.  You can also find the recipe for the Easiest Pie Crust Ever on Epicurious as well.
Result: fabulous!!!  Such a neat little way to do fruit, and what’s really great about making galettes is that you can make them at any size.  Either personal size or one big one, galettes are now on my list of favorite things to bake!  The recipe for the dough doesn’t have a time frame for how long it’s needed in the oven since it can be made in all sorts of sizes, so keep a close eye on it.  Mine clocked in at 35 minutes at 350-degrees.  I also have blueberries and strawberries; they may be used for my next galette!  This dessert will not disappoint; give it a try!

PeachGalette4

PEACH GALETTE
For the dough recipe, go here or here!
For the filling:
6 peaches, peeled and sliced thin, or use any type of fruit
Juice of 1 lemon
1 tablespoon cinnamon
1 teaspoon nutmeg
1 tablespoon brown sugar
1 egg + 1-2 tablespoons of water for egg wash
Sugar, for sprinkling
• Preheat oven to 350-degrees.
• Follow directions for the dough.
• Once dough has chilled for 2 hours, place it on a floured surface and roll out to about 1/4 inch thickness.  Carefully place on a cookie sheet lined with parchment paper or sprayed with non-stick cooking spray.*
• Place the peaches or desired fruit into a medium-sized bowl.  Squeeze juice from the lemon over the fruit.  Sprinkle the spices and brown sugar over the fruit and stir until evenly distributed.
• Spoon prepared fruit in the center of the dough.  Take the edges of dough and carefully fold over the sides to create a “bowl” of fruit.
• For the egg wash, in a small bowl whisk egg and milk well.  Take a pastry brush and brush egg wash on to the dough.  This will give your dough a nice, golden color when baked.  Sprinkle sugar onto the dough.
• Bake galette until dough is golden, about 30-40 minutes.
*Instead of a regular baking sheet, I used a baking stone, like this one here.